14 Ağustos 2012 Salı

Rib-Eye alla Fiorentina with Orange Pickled Shallots

To contact us Click HERE
Working at a public high school is a job that I thoroughly enjoy. Seriously! I like talking to teenagers, and their parents. My job is challenging, with just the right amount of fun, and my day flies by really fast.

Each school year seems to go by faster and faster, and the hard work is rewarded with one month off (without pay).  During my summer break, we had an unexpected treat. Craig's college age niece came to visit us, from Missouri.   She's been enduring triple-digit temperatures--so when I apologized for the overcast and cloudy 60-ish degree weather, she responded that she was thrilled to have a chance to cool off.

At last the sun came out, and it was time to do some backyard grilling. Miss Becky has never had rib-eye steaks. Tsk, tsk.   I needed to expand her college menu, so I bought some rib-eyes, and asked Craig to fire up the Weber grill.   Then I remembered... I had bookmarked a recipe in the June 2011 Cuisine at Home issue. The front cover photo had my mouth watering, and I made a mental note to make it.  The time had come!

According to Cuisine at home, Bistecca alla Fiorentia is one of the most celebrated dishes in Tuscany.  In doing a little bit of internet research, I see that a Porterhouse cut of beef is most traditional.  I think that a Rib-Eyes is a great alternative choice, because it has a lot of marbling. As the interior fat melts, it keeps the steak flavorful and moist-- which is a great failsafe, in case you overcook a bit longer than you intended to.

I realized that I had all of the ingredients to make this recipe, so off I went to make this recipe! I've never been to Tuscany (and it's on my bucket list), so I decided that  Tuscany was coming to our own California backyard.

I always have shallots in my refrigerator, and the pickled shallots are made with fresh orange juice, white wine vinegar, salt and pepper. NOTE: Zest the orange, first, because you'll use it for the steaks. Easy peasy.

 Bring the liquids to a boil, and remove from heat.
Add the shallots, sprinkle with salt, add some pepper, cover and let sit for at least 15 minutes (or make it the night before. Done.
Chop some fresh mint and basil, and add to extra-virgin olive oil and orange zest.(I almost didn't add the mint, because my husband claims he doesn't like it-- more on that, later.)
Add some fresh minced garlic, salt and pepper and add this to a shallow dish. Set aside.
Grill the steaks for about 5 minutes, each side.  The steaks I bought weren't 3-inches thick, so these took about 6 minutes to cook to medium.
 Set the steaks into the olive oil mixture, cover with foil and allow to rest for five minutes; flip the steaks over and serve with the pickled shallots.
Pour your choice of beverage to go with this steak. Serve the steak with the pickled shallots-- which Becky wasn't quite willing to try.  (Kids... even at 21, she's slowly branching out from loving grilled cheese sandwiches.)

VERDICT:  It think that Becky's critique of the steaks speaks volumes-- "these are the best steaks I've ever had in my life!"  (All 21 years...hahaha)
For me, that's the ultimate compliment.  Craig loved the steak, too.  I loved the look of surprise, on his face, when I told him he just ate mint. You see, Craig has always shunned the idea of mint in any kind of food. He says it's too overwhelming.  Ha!  The mint, orange and basil is lovely combination and has a perfect summertime balance of flavors.  Yes, I'd make this again, and I hope you try it.
My summer break ended two weeks ago, and I'm one very busy little worker bee.  Things are starting to settle down, so I can share recipes more often with you.  Yes!
A printable recipe card is at the end of this post. 


nutella swirl steamed cupcakes in 15 minutes

To contact us Click HERE


This is what I made for World Nutella Day yesterday. I've been excited about it for weeks. Sooo many ideas for nutella oozing desserts to make kept buzzing around my brain. I have been happily digging into my jar of nutella all week in anticipation. Finally I was jolted out of my daydreams to realize that I had better make something or it would be too late to post even by today. It was quite late in the evening and the sun had already set so the pics were going to be quite terrible to begin with. I reached into the cabinet for that little jar to see that we were nearly out. Of nutella. There was probably a few tablespoons left in the jar. Great, just great. I had to make a nutella dessert for world nutella day  with a couple of tablespoons of nutella.

That's when I chanced upon a recipe for these steamed cakes. I loved that the recipe calls for very little amounts of ingredients so that it yields only 4 cup cakes- perfect for my current obsession for portion control and small batch baking. And all I had to do was swirl a spoonful of nutella into the batter to make a perfectly delicious nutella dessert. They take about 15 mins to make, use basic ingredients and all you need is a saucepan or skillet with a lid and a stove. No oven required. But best of all is the texture! oh the texture!- its  moist but not dense, fluffy and airy without being dry! I did find the basic cake to be a little less sweeter than I like but that spoonful of nutella will take care of that :)


This is a nutella-tised version of Mushi-pan a Japanese steamed cake. Steaming is a common alternative for baking in Asian cuisine. In Kerala we have a variety of steamed rice flour appams as part of our traditional cuisine. A lot of western style sponge cakes are also made in steamer baskets or pressure cookers in Asia because not many people have ovens. Growing up some of my birthday cakes were cooker cakes since most ovens in India run on electricity and we are plagued by frequent power cuts and voltage problems. Even during my last visit to India in December I had rotten luck with the power cuts seemingly scheduled for the exact moment that I put a pan full of batter into the oven!
Brands like Pillsbury even make cake mixes especially meant for pressure cookers in India and those were some of the first cakes I made, often for roommates birthdays when we had a stove but not even our dinky little toaster oven yet.
These little cakes brought back a lot of memories of those birthdays and they are quick and easy enough that I will be making them in other variations soon. Stay tuned.


Nutella swirled steamed cupcakes
Recipe Source: From Just one cook book here


Yield: Makes 4 cupcakes


Ingredients:

½ cup (75g) all purpose flour ( I used unbleached)
1 tsp. baking powder
1 egg
2 Tbsp. milk
2 Tbsp. sugar ( Will be trying to increase the sugar the next time I make this since they were not as sweet as I'd like)
1 Tbsp. vegetable oil
1/4 tsp vanilla extract
1 Heaped Tbsp of nutella

Instructions:

  • Fill a large frying pan with water to 2/3 full and bring it to a boil (and turn off the heat if you are not ready yet)
  • Put a cupcake liner in glass/ corning-ware ramekins ( make sure these are heatproof and won't crack) 
  • In a medium bowl, sift or whisk together the flour and baking powder combining well.
  • In a small bowl, combine egg, milk, sugar, and vegetable oil and whisk them all together- I did this in a coffee mug. With a fork.
  • Pour the egg mixture into the flour mixture and mix with a fork until smooth.
  • Add in the tablespoon of nutella and stir to creale a swirl in the batter. Don't mix too well else you won't be able to see the swirly effect.
  • Pour the mixture into the cupcake liners trying to make sure that the batter does not spill over the edges of the liners.
  • You may think that there is too little batter but these cakes rise terrifically!So don't worry that your liners are only about 1/4 full.
  • Place the ramekins directly in the skillet with the boiling water and cover to cook about 8-15 mins. If you want you could use steamer inserts or stands but you don't need to- I didn't.
  • Stick a wooden toothpick or skewer into the cake. When a skewer comes out clean (without wet batter), remove them from the pan and place on a rack to cool. If not leave to cook for 5 minute increments until done. 
  • If you undercook they will be dense and gummy and if you overcook they will become rubbery so do check.
  • When cool, the cakes in the liners should pop out of the ramekins pretty easily. If they are stuck to the pan, use a blunt knife or your fingers to pull the cake away from the sides of the ramekins.
My notes: While the texture on these babies is perfect I found them to be a little less sweet than cup cakes I am used to although with the nutella they should be sweet enough. If you try this recipe with a little more sugar before I do , let me know how that works out. Off these fluffies go, a little late, to join in all the nutella madness! 

They are also going to the #chocolatelove blog hop at Junia's 
TweetPin It

Pizza for two with quick & easy homemade Challah dough

To contact us Click HERE


Growing up in a small town in India, pizza was a special treat enjoyed when we visited the city. This was before Dominoes and Pizza hut opened stores in every neighborhood there with guaranteed 30 mins delivery. Mom would sometimes make pizza as an after school treat, but sadly from store bought crusts that were really bad. We would just pick up and eat the toppings which were always delicious covered with amul cheese  and leave that soggy weak crust alone. Sometimes she would use bread instead which was only slightly better. If only she knew how easy it was to make the crust from scratch! 


Thankfully I have found out how easy and fun it is to turn my kitchen into my own pizzeria. There was a lot of outrage about Pizza being considered a vegetable  on school lunches but I kinda get what they mean! Pizza is the perfect vehicle for whatever you want to get your family to eat. Whether it is loads of yummy roasted veggies or whatever you can find in your fridge. Sausages, left over chicken roast...the possibilities are endless. You will feel an immense sense of power when you see that nobody says no to grilled eggplant if its on a pizza! 


This recipe is from the book that got me baking bread- Artisan Bread in Five.  I make a big batch of Zoe and Jeff's lovey Challah dough several times a month and put it in the fridge to make rolls, sweet breads like this cinnamon caramel bubble bread, and this apple braided bread.. It is my favourite dough because its so easy to make and tastes great in both savoury and sweet breads.  Zoe and Jeff  have come out with a whole book on Pizzas and flat bread with many different types of dough and fantabulous toppings.


I like rolling the dough out thin like New York style pizza, on a large half sheet baking tray for parties since the dough can be made upto 5 days ahead and actually tastes better after a day. When I am making it for just the two of us I use my cast iron skillet. Making it in a cast iron skillet makes the crust lovely and crispy but you can really make this in anything that's oven proof with very simple ingredients. I think making a heart shape pizza would be corny but cute for valentine's day and I may just do it but for now here is the recipe so that you can make pizza at home too!

For the Challah dough 
Recipe Source: From Artisan Bread in Five as posted earlier here
( You can halve the recipe to make two medium sized pizzas. remaining dough can be refrigerated or frozen to later make rolls, breadsticks etc. ) 
Ingredients:
  • 1 3/4 cups lukewarm water
  • 1 1/2 tablespoons granulated yeast (2 packets -any kind of yeast is ok)
  • 1 tablespoon salt
  • 4 large eggs, lightly beaten
  • 1/2 cup honey ( I used 1/2 cup sugar instead) 
  • 1/2 cup unsalted butter, melted (or neutral-tasting vegetable oil such as canola- I used oil), plus more for greasing the cookie sheet
  • 7 cups unbleached all-purpose flour
  • You can also add some herbs or garlic powder to the dough if you like
Method1.Mix the yeast, salt, eggs, honey, and melted butter (or oil) and the herbs ( if using) with the water in a 5-quart bowl, or a lidded (no airtight) food container.2. Mix in the flour without kneading, using a spoon.You may need to use wet hands to incorporate the last bit of flour.3. Cover (not airtight), and allow to rest at room temperature until the dough rises and collapses (or flattens on top), approximately 2 hours.4. The dough can be used immediately after the initial rise, though it is easier to handle when cold. Refrigerate in a lidded (not airtight) container and use over the next 5 days. Beyond 5 days, freeze in 1-pound portions in an airtight container for up to 4 weeks. Defrost frozen dough overnight in the refrigerator before using. Then allow the usual rest and rise time.
While the dough is rising, make the Pizza topping:Go crazy an put whatever you want! Just remember not to go overboard else the crust may not get cooked if you overload it, it will be messy and difficult to eat too. Also make sure you have your toppings chopped up and ready before rolling out the dough. You can make your pizza cheeseless too although I generally use a mix of cheese. I use some mozzerella because it melts well with some more flavourful cheeses like Asiago, cheddar etc. We love Cow Girl Creamery cheese which is made with our favourite organic Straus Family Creamery Milk. You can even use the preshredded supermarket cheese but its extra delicious when you use the good stuff. If you are using fresh mozzerella ( which comes floating in liquid) make sure to drain and squeeze out the water else your pizza will be soggy. This is not necessary for regular mozzerella.
This is what I used: 
  • 1 small yellow onion cut into cubes
  • 1 bell pepper (the orange or yellow ones are milder and sweeter) cut into cubes
  • 1 cup of tomato sauce ( I just use a can of fire roasted or plain diced tomatoes and mash it up with a fork. You could also cook down some tomatoes into a thickish sauce with your favourite herbs)  
  • 3-4 cloves of garlic minced ( Do not use garlic paste here-yuck) 
  • Pepperoni sliced thin
Cheese a mix of :
  • Mozzarella ( since it melts well)
  • Asiago, Gruyere or Cowgirl Creamery's Wagon Wheel cheese  for flavour
How to form & bake the Pizza crust:
First go watch this video then read this post
Take a quarter of the dough by scooping it out or cutting it out with kitchen shears. Dust it well with flour and form a ball shape.Stretch it using your knuckles moving it around gently to stretch out the dough careful not to tear it.
You can also roll the dough into a circle using a rolling pin.Place it in a lightly oiled cast iron/ oven proof skillet/ cake pan or even on a rimmed baking sheet and stretch out the dough with your fingers to reach the edges of the panIt's ok even if it tears a little just patch it up with your fingers.Let it sit for about 20 mins if you want a fluffy, chewy bready crust. If you want a more crunchy crust no need to let it rise.
Layering the topping:The important thing to know is that toppings that will burn easily like thin slices of pepperoni and herbs go under the rest of the topping. This is what I do:

  • Preheat the oven to 500 F or 250 C for about 10 mins. If you are using a pizza stone you need to preheat for atleast 30 mins. I don't use a stone. 
  • Spread a layer of tomato sauce on the dough in the skillet 
  • Sprinkle herbs like oregano, rosemary, minced garlic and anything else that might burn easily if its on the top. 
  • Put the pepperoni slices, onions and capsicum over the pizza spreading it out evenly
  • Lastly sprinkle the shredded cheese and slabs of mozzerella here and there
Place in the preheated oven for about 20 -30 mins until the cheese has melted and a toothpick inserted into the crust comes out clean.

Note: If you are piling on a lot of toppings to make a deep dish type pizza, you might have to pre-bake the crust alone for about 5 mins before putting on the toppings as else the crust may sit undercooked under too much topping. 
Leave to cool down and enjoy!TweetPin It

quick cooker carrot pal paysam and a girl's day out in the city!

To contact us Click HERE
carrot pal payasam collage
Gosh has it been a long time since my last post! Where to begin. Well I started working with a non-profit. Even though it is only part-time and I get to work from home,  it has been challenging managing deadlines and conference calls, what with having to report to a toddler as well, who we all know is the most demanding kind of boss!

While I have been cooking some and photographing a little, sadly blogging was put on the back burner. I wished for more hours in the day, but what I was really lacking was motivation.

And then last week, much needed motivation came  in the form of my lovely friends and super talented fellow bloggers Vijitha, Prerna and Kankana.  Along with two other new friends, Viji's Mom and our kids, we took a day off from our everyday routines to meet up in the city. We had been planning and discussing this for weeks. The night before we all made and packed snacks for the little ones, yummy beetroot parathas, ragi patties, chocolate loaf and some vattayappam from me ( recipe coming soon) I was so excited the night before I could hardly sleep, just like before long ago school excursions!

On the morning of our trip, I had a long call from work and all along I kept thinking of the bus I had to take to go meet the girls and if I missed it (which I did) I would have to wait an hour for the next one.  Thankfully T came to the rescue dropping me off to the ferry landing so that I could take the ferry to San Francisco and I must say we traveled in style! My little monkey and I thoroughly enjoyed our ferry ride and I am so glad I ended up missing that bus.

 SF1

If there is one thing that I learnt in life is that everything is much, much better shared with a gang of girl friends. Whether it be prawn pickle in a hostel mess or pre-exam panic, or a beautiful outing. I miss my girl friends and roommates from my college and hostel days a lot and was beginning to think I would never be able to enjoy that kind of female bonding again. I am so thankful to have met some good friends even after moving here and at this stage of my life as a mom, when I think I need friends most!  We talked and laughed and munched, wandering through the market, pushing our strollers with our naughty toddlers along, while around us the city whirled and buzzed. Smartly suited professionals out for lunch waited patiently behind us as we discussed and debated what to order at the numerous little stalls within the ferry building.Young couples out on a date and nosy little pigeons edged out of the way of not one,  not two, but four strollers and us large group of chattering women, brandishing our cameras and clicking away. We must have been quite a sight!
I only took my point and shoot along and left the photography to the experts, but then they decided they wouldn't let me eat my ice cream in peace and suddenly, my melting malted chocolate cone from Humphry Solocome was caught up in the middle of a full blown photo-shoot.  I love that picture taken by Prerna and you can see Kankana and Viji's versions on their blog posts, beautifully capturing our magical day at the San Francisco Ferry building.

There was a farmers market happening that day and some of the girls bought gorgeous heirloom carrots to take home. Since they posted their carrot dishes as part of or impromptu group blogging activity to record our magical day out, I thought I too would blog about this super easy and very delicious cooker carrot pal payasam- a perfect spring time dessert!
palpayasam 3
Pal payasam is a sweet milk pudding that is commonly served in temples as prasadam in Kerala and most of South India. Phirni is a similar sweet dish, popular in North India which is served in clay pots which impart an earthy flavour and draw out the water, making the pudding thicker and creamier. While we add a handful of rice to give the sweet some body, it is not really a rice pudding, more of a milk pudding I think!. I used basmati rice although traditionally a special type of payasam rice called Unakalari is used in Kerala which imparts a pinkish colour to the pudding. You could use brown rice, but do not use glutinous or sticky Asian rice. This payasam is mainly sweetened milk which is slowly cooked, stirring for hours until it has reduced and tastes somewhat like condensed milk. Often it is made with creamy buffalo milk.
I made this in the pressure cooker, so it was super easy and quick, but you can also make this in a slow cooker or the traditional way-cooking it in a wide pot ( so that there is more surface area for the water in the milk to evaporate faster) until the milk has reduced to half it's original volume, though you have to watch that the milk at the bottom of the pan doesn't burn, so you have to stir it occasionally.

I added some grated carrot which melded very well, imparting their sweetness without overpowering the flavour of the milk which is the star. Sometimes a pinch of cardamom powder or saffron is used, and the pudding is  usually garnished with chopped nuts, but I agree with purists that this is not necessary as you don't want anything distracting from the wonderful taste of the reduced milk. 
4 Ingredient, quick and easy Carrot Pal Payasam
Ingredients:
  • Carrots 6 medium ( omit for traditional pal payasam)
  • Kerala Rosematta or Basmati Rice 1/4 cup ( Not sticky or glutinous rice) 
  • Sugar 1/2 to 1 cup ( You can easily adjust  sweetness depending on your preference, start with less and you can also add more sugar if needed at the end) 
  • Milk 4 cups ( I used whole milk) 
  • Ghee or butter 1 tbsp
  • Chopped nuts for garnishing ( not necessary) 
Directions
Pulse the rice in a blender a few times to break it up. Do not grind it to a powder. (I skip this step if I'm in a hurry.)Wash the broken rice and let it drain in a strainerGrate the carrots using a box grater or food processorHeat the ghee or butter in a large pressure cooker or a heavy pot Add the carrots and cook, stirring until they no longer taste rawAdd the sugar and stir for a few minutes more until the sugar melts completelyNow add the rice and the milk  and mix everything wellIf you are using a pressure cooker, put the lid and the whistle on. Cook on medium heat until one whistle.As soon as the whistle goes, switch the heat on to low for about 10 more minutes and then switch off the flame.(If you leave it on for too long, the pressure cooker may leak all over your kitchen so be careful!)Once you have switched off the heat, leave it on the stove until all the steam has gone.(Go do something else like paint your nails or read that blog post you had bookmarked!)Once all the steam has gone, open the pressure cooker and taste. If you want you can add more sugar now.
Stir the payasam occasionally on med-low flame (with the lid off) to thicken it more to your liking.
Serve warm or chilled ( I prefer it chilled as it gets a little thicker and creamier)Keeps well in a lidded container in the fridge for a few days. Make sure it has cooled before keeping in the fridge.

The taste of this payasam is rich and luxurious and I was craving it for days after it was all over. You might think that 1/4 cup of rice is not much but it really bulks up, absorbing the milk and you really don't want to add more. Even if you are a cardamom freak like me, and be tempted to add some or other spices- don't. Let the reduced milk flavor shine through!

I will be sending my carrot pal payasam to The Kerala Kitchen hosted by Jehanne of The Cooking Doctor this month TweetPin It

blueberry coconut vegan scones - no butter, no eggs

To contact us Click HERE
Blueberry Coconut Vegan Scones

Hope you are all having a good summer. Can you believe that it's almost August already? I think this is my favourite season (but then, I do say that every season! ) Picnics, trips to the beach, bbqs, road trips...summer is just the perfect time for fun and for portable, finger friendly food, that you can pack and take along, like these blueberry coconut scones. 
We made a trip up to beautiful Carmel some time ago and I baked up these blueberry scones to take with us.  I made them with coconut milk so my little dairy allergic munchkin could have them too, but you could use any kind of milk. For good measure I tossed in some shredded coconut and blueberries which bubbled and burst in the oven, leaking rivulets of purple juices.

Isn't it kind of weird that blueberries are actually a translucent green inside? When you bake them, the inside turns purply too. Baking really makes blueberries even better, turning them jammy and juicy and wonderful.
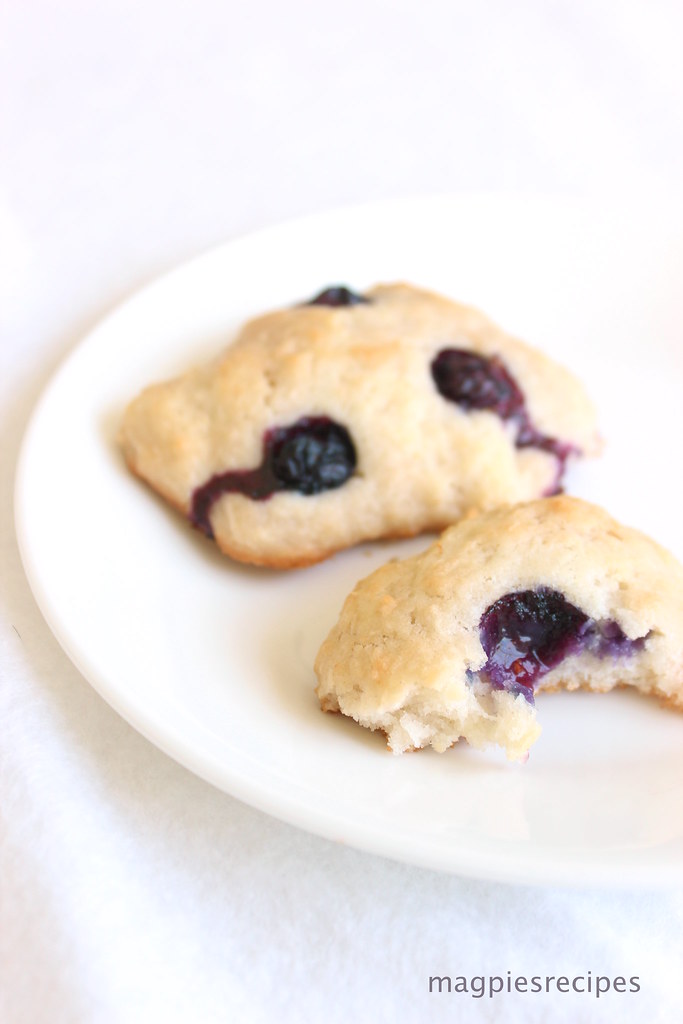
These are not exactly like the traditional butter scones. These are super simple and quick to make- everything gets mixed together in one bowl with a fork.  The batter is somewhat loose and you drop them by the tablespoons and bake. That's it. They are as delicious though, with a crisp exterior and all tender and soft inside- good on their own, fantastic with some buttery spread and preserves. 
You can skip the coconut if you are not a coconut lover and replace the coconut milk with any other milk. Play around with them- a little zest, some spice, dried fruit?  

Here is a picture from Carmel, on a drive to Big Sur. I had to walk down small trail, braving poison oak and stand on the edge of a cliff, risking my neck to take this pic for you all. It is a truly beautiful place, simply spectacular sights and if we stopped every time I wanted to enjoy the jaw-dropping view and take pictures, the drive would have taken us several days at least. 
Beautiful Carmel


Downtown Carmel is like walking into a fairytale. There are moss covered cottages filled with sweets, quaint tea shops, galleries and secret passages. The Monterey Bay aquarium is also close by so if you are making a trip that side, it is definitely worth visiting too.


It was quite sad to come away from a truly dreamy weekend there, but I'm glad to have the memories, pictures and these scones!  

Blueberry Coconut Vegan Scones
Ingredients:
  • 2 cups all-purpose flour
  • 1 tablespoon baking powder
  • 3 tablespoons sugar ( you can use other sweetner of your choice) 
  • 1/4 teaspoon salt
  • 1/2 cup coconut or canola oil ( If you prefer you can use an equal amount melted butter) 
  • 1 cup coconut milk ( any kind is ok. You can use soy or almond milk or even regular milk) 
  • 1/2 cup shredded coconut ( I used the frozen kind, thawed) 
  • 1/2 cup fresh or frozen blueberries

Directions:
Preheat oven to 450 degrees F (230 degrees C).
In a large bowl, combine all the dry ingredients: flour, baking powder, sugar and salt.
Stir in the oil and coconut milk and shredded coconut with a fork just until the mixture is moistened and comes together.
Stir in the blueberries gently so they don't burst. 
Drop tablespoons of the batter on a lightly greased baking sheet
Bake in the preheated oven until golden on the edges, about 8 to 12 minutes. Serve warm.
Store in airtight container or zip bag at room temperature for up to two days. You could freeze them for longer.
They are best eaten on the day they were baked,  when they are crisp on the outside and tender inside,
The will get a little soft and cake-like after the first day. 
You could re-crisp them by warming in the oven for about 5 mins, although I did like them soft too, and by the second day they get a stronger coconutty flavour.
If you want to keep them longer it might be better to refrigerate or freeze them, though I have not tried this, I think they would get even softer, and you might want to warm them up in the oven before eating. 

Take along with you when you are out enjoying these long sunny days, for only just a little while longer!

TweetPin It